Author Archives: Jacob Engelsman

Benne Wafers, or Sesame Seed Cookies

If there is one book every Southern household should posses, be it a one-bedroom apartment or a grand, ancestral estate; it’s Charleston Receipts. It’s full of amazing recipes, idioms and household tips from days gone by. Some of it is slightly out-dated, to be sure, but a good portion of it is delicious cookies. This recipe is one of a few for Benne Cookies, “benne” being another word for sesame seed.

Before we begin, let’s talk for a second about brown sugar. Brown sugar is my new best friend. Never, ever buy brown sugar. Whenever you need brown sugar, here’s what you do instead: Mix 1 cup sugar with 1 Tablespoon molasses. It will clump up a bit at first, but keep mixing and eventually you’ll end up with what is quite clearly brown sugar. Way cheaper and literally exactly the same thing. You’re welcome.

IMAG0238

Benne Wafers (makes 6-7 dozen, I made a half batch)

1 1/2 c. brown sugar (or 1 1/2 c. sugar mixed with 1 1/2 T. molasses, as per above)

3/4 lb. butter, room temp.

1 egg

3/4 c. flour

1/4 t. baking powder

1/4 t. salt

1 c. sesame seed

Pre-heat oven to 300F.

IMAG0240

This is just your standard cookie technique: Mix together sugar and butter, add the egg (a lot of people scoff at the notion of halving an egg, it’s very simple; scramble the egg, then measure it out and use half) and mix until smooth. Add dry ingredients and mix  until fully incorporated. Measure out in heaping teaspoons place about 2 or 3 inches apart on parchment paper (they spread pretty far) and bake for 15 minutes, one sheet at a time.

IMAG0243

Tagged , , , , , , , , , ,

Overnight Ox-tail Soup

I don’t how many of you are fans of You’re Doing It Wrong, but I am not. I firmly believe that there are at least 9 ways to skin a cat and 4 ways to dice an onion. BUT, that doesn’t mean that there aren’t little tricks out there that can help you improve certain dishes. Rinsing rice (except arborrio), and swapping bananas for eggs in scones come to mind. Here’s another: pretty much any soup will taste better the day after you make it. This is particularly true of a soup wherein you cook the meat first, because it gives you the opportunity to remove the fat which will solidify in the refrigerator.

IMG_20131102_093845

Overnight Ox-tail Soup

First Day:

-1 1/2 lbs ox-tail

-1/2 inch dice of aromatic vegetables (3 carrots, 3 stalks celery, 1 medium onion, 3 cloves garlic minced)

-2 bay leaves

-1 Tablespoon dried spices (I like to use equal parts thyme, rosemary and crushed red pepper; but feel free to mix it up)

-28 oz. can crushed tomato

-1 Tablespoon tomato paste

-Enough water to cover the meat

This definitely falls onto the complex end of the spectrum, but I promise you, it’s simple enough. Bon courage! And remember, this is a soup, so most of the measurements are ballpark and to taste.

IMG_20131102_093641

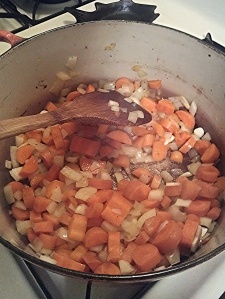
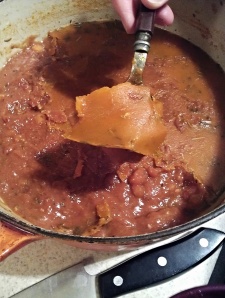
In a dutch oven, brown the ox-tail sections (I’ve never seen a whole one at the butcher’s, but if that’s all they have ask to have it cut) on all sides over a medium-high heat. This is an occasion to wear an apron, there will be spatter, and it will stain your shirt or burn your arm. Remove to a plate, but leave the fat in the pan. Add in the aromatic vegetables (what the French call mirepoix) and stir these until soft, the plan is for them to turn to mush by the time it’s done. Add the remaining ingredients, turn the heat down and let this whole business simmer at least 3 hours. Stir occasionally to prevent sticking and add water if it gets lower than the meat, but you can leave it alone for the most part. After a good simmer, let the soup come down to room temperature and then refrigerate it overnight.

IMG_20131102_093457

Second Day:

-1 1/2 c red wine

-Vegetables (this time we used half of a patty pan squash, a dozen Brussels sprouts, and maybe a pound of potatoes, but you can do whatever you want)

IMG_20131102_092646

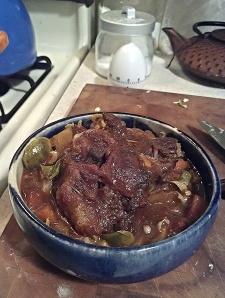
Remove the solidified fat from the top of the soup (this time I got most of a cup!), add the wine and return to a boil. I suggest using a red that you wouldn’t mind drinking with the soup, this time I used a Spanish tempranillo that Svetlana at the Bottle Shop pointed us to.  Add the vegetables and continue to cook for about an hour or so. By then the vegetables should be ready and  the meat fork-tender. Done. Simple, non?

IMG_20131102_092238


Tagged , , , , , , ,

Btw, Gnocchi is Unbelievably Easy

Gnocchi is one of those things that many people only get at restaurants, partly because store-bought is usually not-so-good and partly because they have no idea how easy it is to make at home. Way easier than pasta, easier even than bread. More on par with cookies. That easy. Here we go:

IMG_20131025_032238

Potato Gnocchi for Two

-1 lb. Russett or Idaho potato (since it’s hard to get an exact amount of potato, go with anything between 14-16 oz.)

-1 egg

-1/2 cup all purpose flour

-pinch of nutmeg, if you like

-I don’t add salt because I salt the water pretty heavily.

First things first, if you have such a thing as a ricer in your kitchen, this is what its for. If not, that’s fine, we’ll use a regular potato masher. If you don’t know what a ricer is, click here.

IMG_20131025_031906

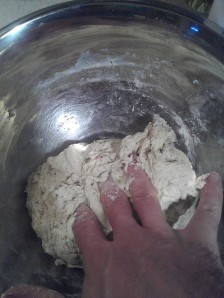
Boil the potatoes whole, until you can break them with a fork and the skin slides off. While they’re still hot, mash them up super-fine or put them in the ricer which is basically a giant garlic press. Scramble the egg(s) in a bowl and add to the potatoes and stir up real good. Now add the flour and stir until just combined. You don’t want to develop too much gluten or you’ll end up with hard gnocchi. A chef I used to work for said, “Don’t knead it, want it.” I’ve always liked that.

IMG_20131025_032127

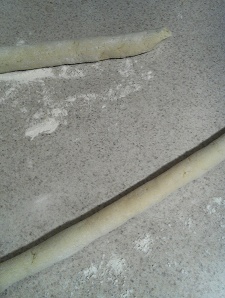
Once it’s all mixed in, take a hunk (depending on how much counter space you have) and roll a snake about one to one-point-five inches wide. Cut into sections of a similar length and toss onto a well-floured sheet. Continue in this manner until all the dough is cut. There’s a cool (but not strictly necessary) maneuver you can do with a fork to make ridges, but I’ve found it very hard to describe. Therefore, here is a link with a video of a lady teaching others how to do it. Also some good looking sauces. Watch the video.

IMG_20131025_031701

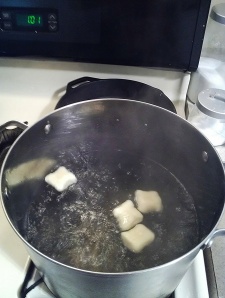
While cutting the dough, get a big pot of water on to boil. Salt it like you would for pasta. Toss maybe twenty in at a time and be ready to take them out in about two minutes. You’re going to see them bob at the top for a few seconds, then start floating determinedly, this is when they’re ready. In another 30 seconds will be over-done and start to fall apart, so be quick. Using a slotted spoon, remove them to a bowl very quickly and toss in some olive oil or melted butter. Cook the rest in batches like this until they’re all done and switch to a different serving dish or serve on plates, so they’re not sitting in a pool of oil and water at the bottom of your bowl. Serve with pesto, marinara or whatever sauce you like.

IMG_20131025_024403

Tagged , , , , , , ,

Raivas: Easy Cookies Because I’m Training

I’ll be honest with all of you, this week I’m finishing up training for the AthHalf race so my posts are going to be short and sweet. Today we’re making raivas, a Portugese cookie that, yes, is supposed to be kind of cakey. It isn’t what we in The States are used to, but they’re great for dunking in tea, coffee or a mulled wine. And they look really cool! Every recipe I’ve found for this recipe is exactly the same (with the exception that some called for 4 Tablespoons of butter as opposed to 5), so I’m going to give credit to the book that I first found it in: Nick Malgieri‘s A Baker’s Tour.

OLYMPUS DIGITAL CAMERA

Raivas

-2 cups all purpose flour

-1 teaspoon cinnamon

-5 Tablespoons unsalted butter, room temperature

-1/2 cup sugar

-3 eggs

First, pre-heat the oven to 350F.

This is a pretty standard technique for mixing cookie dough: mix together the dry ingredients (in this case flour and cinnamon) and set aside. Next, whip the butter and sugar together until it’s nice and fluffy. You can do this by hand or with and electric mixer. Now add the eggs to the butter mixture and mix until they are fully incorporated (you’re better off adding them one at a time, trust me). Add the flour mixture and mix that just until it’s all in there. You don’t want to make too much gluten.

Now comes the fun part: Divide the dough into 24 equal pieces. An easy way to do this if you don’t have a scale is to divide the dough in half, then divide each of those into thirds, then divide each of those into quarters. And there you go: 2x3x4=24. Roll each one of these bad-boys into a snake 20 inches long. I find you’re better off just using your fingers, when I tried to use my palms they got all smooshed. Now join the ends together and gently scrunch them up into a scrunched-up shape. Elegant, me. You can also make most letters pretty well, while you’re scrunching. Play around with it. When you’ve got one done, place it on a buttered or papered baking sheet and move on to the next. These only puff a little bit during cooking, so you can place them pretty close togeter. Leave about 1 inche between each cookie. Bake the sheets, one at a time for 12 to 15 minutes, rotating once mid-way. Remove to a cooling rack and serve with a nice, hot beverage. Check out the links to some other cool cookie recipes I found.


Tagged , , , , ,

Oat Praline Buttermilk Bonbons. That’s Right.

I’m not 100% sure, but I think I just invented a new candy, then I dipped it in chocolate! I’m calling it the oat praline buttermilk bonbon. It’s a two-part recipe and takes a little doing, but it’s totally worth it.

Oat Praline Buttermilk Bonbons

Oat Praline

-1/3 cup steel-cut oats

-1/2 cup sugar

I haven’t tried this recipe with rolled oats yet, so I’m hesitant to say it will work just the same, but it might.

First things first, toast the oats by placing them in a dry frying pan (a six-inch if you have one) on a low heat. In a few minutes they’ll darken up a little and start to smell nice and toasty. Shimmy and stir them often to keep the toasting even. When they start to make a little crackly noise, transfer to a plate to cool.

IMG_20131005_070708

Now place the sugar in the same pan and melt on a medium low heat. When the sugar begins to melt, begin stirring with a rubber spatula and don’t stop until it’s smooth and slightly darkened. Turn off the heat, add in the oats and quickly stir until fully incorporated. Pour the mixture onto a parchment paper or, in a pinch, a buttered baking sheet.

IMG_20131005_070344

Let cool for about 15 minutes, then break into small pieces and crush either with a blender or chop on a cutting board, then use a cup and bowl as a makeshift mortar and pestle. This makes about 3/4 cup, which should be stored in an airtight container. Sprinkle on cakes, ice cream, oatmeal, or use in:

Old Fashioned Buttermilk Candy

When researching buttermilk candy I found this exact same recipe in no less than 6 different places, which means two things: 1) I have no idea where it originally came from, and 2) It had to be delicious. It is. My wife said it was candy for grown-ups.

-1 cup sugar

-1/2 cup buttermilk

-1 1/2 Tablespoons butter

-1/4 – 3/4  cup oat praline, depending on how oaty you like it.

Measure the sugar, buttermilk, and butter right into the frying pan and turn on a low heat. While waiting for things to get going, fill a clear glass with cold water. Trust me. You’re also going to need a spoon, mixing bowl, whisk, and small, buttered dish. A plate will work in a pinch.

IMG_20131006_014510

Once the sugar starts to belt and the milk boils, stir with your rubber spatula to dissolve the sugar. After that, stir just often enough to prevent sticking. After the mixture has been simmering for 10 minutes, when the mixture has thickened a bit, take a small spoonful of the liquid and dribble it into the water. It’s not really necessary to go through all the stages of candy temperatures (which wouldn’t be that accurate anyway due to the buttermilk and butter in the sugar) so I’ll just give you the pertinent information. When the liquid hits the water, it will probably dissipate into bits. This means it’s not ready yet. Try again about once a minute until the drop to turns into a little ball that stays more-or-less in ball form all the way down.

IMG_20131005_070115

When your candy reaches this stage, pour it into a mixing bowl, add the praline and start whisking. This is going to take about 10 minutes, so if you have an electric mixer you may want to use it.Keep whisking until pretty cool, at which point it should be thick and hold streaks pretty well.  Transfer this to  the buttered dish and allow to cool at room temp at least 3 hours or even overnight. Form into 1 1/2 inch balls, you should end up with about 14, depending on how much praline you used. Refrigerate until set, then store in an airtight container layered with parchment paper. These are super-delicious on their own or just rolled in a little powdered sugar, but if you want to chocolate coat them, who am I to stop you? Also, a little touch of sea salt never hurt.

IMG_20131006_014717

Chocolate Coating

-1/2 lb. semi-sweet chocolate

-that is all

Set up a double boiler by placing the chocolate in a bowl that is sitting on top of a pot with about an inch of water in it. Set to a medium heat and stir the chocolate until it melts. Be very careful not to let any water get in the chocolate or it will become all grainy and horrible.

When the chocolate is smooth, remove the bowl from the pot. Dip the candies in the chocolate one at a time, coating and removing as quickly as possible. You can cover them entirely if you like, or dip them partially like buckeyes. Refrigerate again to set the chocolate (half-an-hour) and store with parchment paper in an airtight container, which is always a good rule for storing candies.

IMG_20131005_065542

Tagged , , , , , ,

Wifey’s Spicy Cornbread

This week I followed The Missus around and took pictures while she made cornbread. She makes fantastic cornbread and I thought it would be cruel not to share this with the world. There are those of you who will be aghast at the presence of sugar in the recipe; but I should let you know that neither I, nor my wife, comes from a family native to The South. I should also let you know that the original recipe we started with came from The Joy of Cooking. We’ve been tinkering with it over the years, but I should give credit where it’s due.

Adobo Chili Cornbread (for a 6 inch cast-iron skillet. If using an 8 inch skillet, double the recipe)

-7/8 cups cornmeal (1 cup minus 2 Tablespoon)

-2 Tablespoons sugar

-1/2 teaspoon baking powder

-1/2 teaspoon baking soda

-1/2 teaspoon salt

-1 egg

-1 cup buttermilk (in a pinch you can fake buttermilk by mixing 1 Tablespoon distilled vinegar or lemon juice with 1 cup milk)

-2 chipotles in adobo sauce (available at most grocery stores with a decent Latin American selection)

IMAG0157

Butter up your skillet real good, then place in the oven and pre-heat to 350F.

Chop up the peppers in an 1/8 inch dice. I like to use a plastic bag so I don’t mank up my cutting board.

Whisk together the dry ingredients in one bowl, and mix the buttermilk and egg together with a fork in a separate bowl.

IMAG0154

Pour wet into dry, and whisk together quickly. Once the buttermilk reacts with the baking soda, the timer on leavening starts. Mix in the chopped chilis, remove the pan from the oven and pour in the batter. The batter will start to cook immediately, this is good just be careful.

IMAG0161

Put the pan back in the oven and set your timer for 20 to 25 minutes. When it’s done, a knife will come out clean. Let it cool about 10 minutes and it should pop right out of the pan. You can eat this immediately if you want, but the chili flavor will come out better the next day.

IMAG0164

Tagged , , , , ,

Oyster Season! In Soup Form!

To me, the oyster is like an avocado in one important respect: I fail to see how you could possibly improve upon it in it’s natural state. Open, eat. Perfect. But there’s been a lot of oyster related stuff happening in my life lately: I just finished The Big Oyster by Mark Kurlansky, (a fantastic read if you have an interest in both food history and the history of New York City) I’ve recently picked up some part-time hours at a restaurant which is known for it’s bivalves, and most recently I’ve been plowing through How to Cook a Rogue Elephant, a gastrologue by Peter Van Rensselaer Livingston, which is both entertaining and highly informative about the history and preperation of a great variety of dishes. While most of his recipes are well into the complex end of the spectrum, he lists an oyster soup which, unlike similar recipes does not, as he puts it, “spoil both the oysters and the milk.” The key, apparently is to cook the oysters through as opposed to heating them slightly and adding them at the end. The recipe I’m using is sufficiently different that I’d feel weird calling it his recipe, but he still deserves the shout out.

IMAG0147

Oyster Soup

-3 cups half-and-half at room temperature

-1 medium onion, 1/2 inch dice

-2-3 Tablespoons butter

-1 pint oysters, strained with liquor reserved

-1/4 lb smoked sausage, 1/2 inch dice

-2 teaspoon sea salt

First, melt your butter over a low heat and add the onions. Cook them slowly until they are just getting translucent, but not brown at all. If needed, rinse off the oysters, then add them to the pot and bring the heat up to medium-high. A substantial amount of water will be released, this is fine. About 5 minutes on, the oysters should look a bit cooked. More of a matte finish, less of a high-gloss.

IMAG0149

Now this next part is important: Turn the heat down as low as it will go, add the oyster liquor and half-and-half (which should be at room temperature otherwise the shock can cause breakage.) Leave for at least one hour, stirring occasionally to prevent sticking. If it gets too hot, it will break. If it breaks, it will still be delicious just not as pretty. Boo. Season with 2 teaspoons salt at this time.

IMAG0148

While you wait, brown the diced sausage over a medium heat until nice and crispy. I’ll level with you, I meant to take a picture of the sausage and forgot. You know what crispy looks like, right? Do that. Either swirl these in right before serving or sprinkle on top in each bowl. This soup will serve 4 as a starter or 2 as a hearty main course with salad and focaccia.

Tagged , , , , ,

Everybody Does a No-Knead…

No-Knead bread made the rounds online back in ’06 when Bittman made it famous writing for the New York Times. It wasn’t the first such recipe, but it definitely popularized the technique. Since then, there have been myriad variations and of course I have my own. I’ve also  experimented with combining this technique with a similar one I learned about in Peter Reinhart’s The Bread Baker’s Apprentice, called pain a l’ancienne, which I’ll talk more about later.

IMAG0140

No-Knead Boule

-14 oz. or 2 1/2 c. all purpose flour (you know I love my King Arthur)

-2 oz or 1/2 c. Whole Wheat flour

-1/4 teaspoon dry yeast

-1 teaspoon table salt

-1 1/2 c. water

The mass appeal to this recipe lies in the high fiddliness to tastiness ratio. By which I mean, it’s really tasty and really easy. The only problem with this recipe is that you need a cast iron or enamal Dutch oven. A steel stock pot will not work.

Step one is just mix all this together, cover and leave at room temperature for at least 12 but not more than 16 hours. For some reason leaving it longer than 16 hours has a slightly detrimental effect on the flavor. UNLESS you want to let it go a solid 24 hours, in which case you can also employ the pain a l’ancienne technique by making the dough with iced water, and leaving it in the refrigerator for 12 hours then moving it to room temperature for another 12 hours. The advantage here is a more complex flavor due to enzymes and stuff. Try it out, it’s fun.

IMAG0123

12 to 24 hours later, you’re going to have a big, wet, bubbly mass of dough. It looks pretty thin, that’s alright. Using a rubber spatula, maneuver the dough onto a well-floured surface into a round-ish shape. I like to use the whole wheat flour for this, and I’m serious about the well-floured part, you’re better off using an extra couple of Tablespoons of flour than having the dough stick to the counter. Let is sit for 15 minutes, it’s not going to look any different afterwards, but the glutens will relax and the dough will be much easier to work with.

Run your fingertips under the edge of the dough to make sure it’s not sticking, then fold the dough into thirds like a letter. ‘Cause you know, that’s still a relevant turn-of-phrase. Now fold it in thirds the other way, so you have a nice looking ball. Do your best to brush off any major lumps of flour.

IMAG0131 IMAG0133 IMAG0135 IMAG0136

Flour up a piece of fabric (butter muslin, a linen napkin or even a tee shirt, but not terry-cloth) which you can transfer the dough, seam side down, onto. Fold the corners up to loosely cover the dough and let sit 1 to 1 1/2 hours. Whatever you do, don’t let it get wider than the base of your Dutch oven. Speaking of which, put the Dutch oven in your oven now and pre-heat to at least 500F, or higher if your oven goes higher.

No comes the fun part. When the oven is heated and the bread is risen do these in this order:

-Unwrap the bread, make sure the edges aren’t stuck to the fabric.

-Take the super-hot Dutch oven out of the oven, take the lid off, leave the oven door open.

-Pick up the dough, with your hand under the fabric.

-Flop the dough, seam side is now up, into the pot. Shimmy the pot a little to center the dough. It’s fine.

-Lid on the pot, pot in the oven, shut the door, set timer for 20 minutes.

IMAG0137

After the first 20 minutes, take the lid off the pot and set your timer for another 20. Depending on your oven you may need 25 minutes, the bread is done when the crust is brown and crunchy.

Remove from Dutch oven, let cool to room temp, enjoy. Feel free to knock off any excess flour.

This bread makes a particularly excellent grilled cheese sandwich, by the way.

Tagged , , , , , , , ,

Marbleized Shortbread

Shortbread was one of the original posts I wanted to do for this site, but it seemed a little too simple. I don’t want this to be one of those blogs that posts a recipe for scrambled eggs or a cheese sandwich. I’d considered perhaps posting two or three different recipes, e.g. Scotch, brown sugar, and chocolate to make up for the utter simplicity of them, but that still didn’t seem right. Yesterday it hit me all at once, marbleize the Scotch shortbread and brown sugar shortbread. It took a little tinkering to make sure the consistency would be the same for both, but I worked it out and am pretty pleased with the results. Right after I put it in the pan I realized that next time I make this I should make an Earth, or if The Missus has her way, Westeros. Break out a little food coloring and the possibilities are nearly endless.

Marbleized Shortbread

makes an 8″ round (12 pieces)

For Scotch shortbread:

-1/3 cup white sugar

-1 stick butter, room temp.

-1 cup all purpose flour

-1/8 teaspoon salt

For Brown Sugar Shortbread

-1/2 cup light brown sugar, packed

-1 stick butter

-1 cup all purpose flour

-1/8 teaspoon salt

-1/4 teaspoon cinnamon

I would suggest making the Scotch shortbread dough first so you won’t have to wash the bowl between batches. The technique for making each is the same, so I’ll just go over it once. Preheat the oven to 350F.

IMAG0099

Place the butter in a mixing bowl and whisk it good for at least one full minute, then add the sugar and continue whisking for another minute and a half. When the butter climbs the sides of the bowl, just scrape it down and continue whisking. Using a rubber spatula, fold in the flour and salt just until it becomes a solid mass. Place the dough on a plate and start over with the brown sugar, don’t forget to add the cinnamon with the flour this time. For an even more dramatic color difference, you can substitute 1 or 1.5 Tablespoons of cocoa powder for the flour with no  ill effects.

IMAG0098

I baked mine in the 8″ cast iron, but if you don’t have a cast iron skillet you’re comfortable baking in you can use a glass baking dish of the same size. Shockingly, there is no need to grease the pan for this recipe. Take little hunks of both doughs and randomly distribute them around the pan.

IMAG0101

When you’ve got a pretty even distributiton, use your fingertips and gently press it down to make sure the height and density are even. Now use the back of a spoon or the bottom of a glass to smooth out the surface. Good. Now score it with a knife to make 12 pettiecoats (as they are called) and poke it all over with a fork. No one knows why.

IMAG0106

Place in the middle of the oven and bake for 45 minutes, turning about halfway through. When done, the edges will be browned, although the center may feel a little soft. Re-cut the score marks and let cool in the pan 15-20 minutes before removing to a cooling rack. The color will darken as it cools, serve at room temperature.

IMAG0111

Tagged , , , , , ,

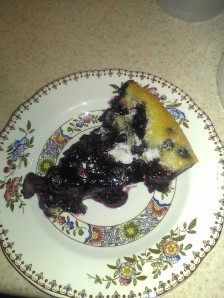
Clafoutis, Southern Style

I don’t do a lot of desserts here, which is weird because I do make a lot of them in my day-to-day life. One of these days I’ll get around to making a Queen of Puddings, but today I just wanted something quick and fruit-based. I’ve been on kind of a French kick lately so I decided on a nice clafoutis. Also, as it turns out, since the recipe is mostly eggs, milk and fruit, it’s very easy to convince yourself (and spouse) that this is a suitable breakfast. Awesome

The first question of course is, which fruit? Cherries are the traditional filling because cherries are cheap and plentiful in Limousin, the province of France from which this dish hails, and it’s meant to be a simple dessert. Not anything you’d have to go far out of your way to make. In my case (Northern Georgia in the late summer,) that means blueberries.

I strated with a recipe I found in French Feasts, but figured it would need some alteration due to the juiciness of blueberries, so I dipped into the classic Mastering the Art… which is one of those books I don’t pull out very often, but when I do I’m glad to have it. And as luck would have it, the section on clafoutis has instructtions for a blueberry variation calling for additional flour. Now, this isn’t a verbatim reprint, Mrs. Child and I still have minor disagreements over things like the use of vanilla extract. But I still go to her when I have a question about desserts.

Blueberry Clafoutis

IMAG0096

-1 1/4 lb fresh or frozen blueberries

-1 1/4 cup all purpose flour

-1/4 cup sugar

-1 cup milk

-2 eggs

-2 Tabespoons sugar

-butter for the pan

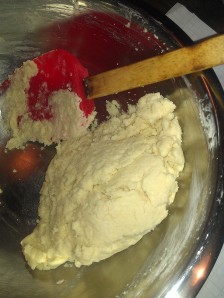
First, butter a pie pan or 8×8 baking pan and preheat the oven to 350F. Place the berries in the pan and set aside. In a mixing bowl, combine the flour, sugar, milk and eggs. Whisk until smooth. Pour the batter over the berries, and let it sit 5-10 minutes to settle in the crevices. Bake for 1 hour, it will be puffed and browned when done. Sprinkle all over with the other 2 Tablespoons of sugar and let cool to room temp by which time it will have sunk.
IMAG0093

Tagged , , , , , ,
ice cream magazines

................... for lovers of ice cream. Your free on line magazine for sweet frozen treats. Recipes, inspiration, artisanal ideas for your delectation.

salt and lime juice

food filled with nostalgia for mexico ♥

Vegan Monologue

Just food! No nonsense. Portland, OR.

Simply Made Kitchen and Crafts

Wholesome family living, simple recipes and crafts

Chef in disguise

Easy authentic middle eastern recipes

Fromage Homage

A British Isles Cheese Odyssey

But First, We Eat

History of All Things Food-Related

aquamarinestephblog

Writing, traveling, cooking & looking for ancestors....1 person at a time.

sweetsavant

I cook, entertain and share my recipes, ideas and sometimes a stray thought or two

Sockmonkey's Kitchen

Foodie turned blogger. How'd that happen?

Getting to know CO

Exploring CO's wildlife, parks, events, and places of interest, plus cooking and whatever else I feel like blogging about!

sensitive flour

Gluten-free cooking, baking, eating

Cucina Amore Adventures

Drop in for an Espresso & an exciting bite to Eat. Lets share our crazy adventures!

The Solo Cook

The single's guide to growing, cooking and savoring food

Stef's Gastronomy

Life's too short tofu around

Afroculinaria

Exploring Culinary Traditions of Africa, African America and the African Diaspora

Rachel Gaffney's Real Ireland

Bringing the Real Ireland to your life

Rotem's Beyti

Cooking and eating adventures in Israel

Get Forked

Recipes, Ramblings & Restaurant Reviews

Sauce Boss

The Madness, Memoirs and Musings of a Culinary Dark Genius

Just Garnished

edibles jazzed up with a personal twist

A Crust Eaten

Living life one plate at a time

ButterNBourbon

Southern Gentleman's Indulgence

Mind Your Peas & Food

Mindful Food for Mindful Eaters

Chaos and Cookies

Where life and food come together!

Fleur-De-Licious

Butter || Sugar || Real life

The Perky Poppy Seed

Everything Food from a Perky Personal Chef's Perspective

Eating With Ziggy

Dining Well, Spelling Pourly

Nutty Kitchen

cook for life!

Eating Whole

A vegan & allergy-friendly lifestyle.

Becca Steinhoff

Comedian, Writer, Smartass

phickles

a small batch pickle company in Athens, Georgia ...preserving the best of every season!

Cook Up a Story

Inspiration and Recipes for Growing Families

BitterSweet

Sweet Musings with a Bitterly Sharp Wit

Foodologie

A Blog about Balancing Health with a Constant Desire to Eat Cake

One Man's Meat

Multi-award winning food blog, written in Dublin, Ireland.

Best Room in the House

"No matter where I serve my guests, it seems they like my kitchen best."

Pocket Full Of Rye

College, Cookery, and Photographs

We Call Him Yes!Chef!

"because life is too short to eat crappy food"...Yes!Chef!