Category Archives: Snack

Benne Wafers, or Sesame Seed Cookies

If there is one book every Southern household should posses, be it a one-bedroom apartment or a grand, ancestral estate; it’s Charleston Receipts. It’s full of amazing recipes, idioms and household tips from days gone by. Some of it is slightly out-dated, to be sure, but a good portion of it is delicious cookies. This recipe is one of a few for Benne Cookies, “benne” being another word for sesame seed.

Before we begin, let’s talk for a second about brown sugar. Brown sugar is my new best friend. Never, ever buy brown sugar. Whenever you need brown sugar, here’s what you do instead: Mix 1 cup sugar with 1 Tablespoon molasses. It will clump up a bit at first, but keep mixing and eventually you’ll end up with what is quite clearly brown sugar. Way cheaper and literally exactly the same thing. You’re welcome.

IMAG0238

Benne Wafers (makes 6-7 dozen, I made a half batch)

1 1/2 c. brown sugar (or 1 1/2 c. sugar mixed with 1 1/2 T. molasses, as per above)

3/4 lb. butter, room temp.

1 egg

3/4 c. flour

1/4 t. baking powder

1/4 t. salt

1 c. sesame seed

Pre-heat oven to 300F.

IMAG0240

This is just your standard cookie technique: Mix together sugar and butter, add the egg (a lot of people scoff at the notion of halving an egg, it’s very simple; scramble the egg, then measure it out and use half) and mix until smooth. Add dry ingredients and mix  until fully incorporated. Measure out in heaping teaspoons place about 2 or 3 inches apart on parchment paper (they spread pretty far) and bake for 15 minutes, one sheet at a time.

IMAG0243

Tagged , , , , , , , , , ,

Raivas: Easy Cookies Because I’m Training

I’ll be honest with all of you, this week I’m finishing up training for the AthHalf race so my posts are going to be short and sweet. Today we’re making raivas, a Portugese cookie that, yes, is supposed to be kind of cakey. It isn’t what we in The States are used to, but they’re great for dunking in tea, coffee or a mulled wine. And they look really cool! Every recipe I’ve found for this recipe is exactly the same (with the exception that some called for 4 Tablespoons of butter as opposed to 5), so I’m going to give credit to the book that I first found it in: Nick Malgieri‘s A Baker’s Tour.

OLYMPUS DIGITAL CAMERA

Raivas

-2 cups all purpose flour

-1 teaspoon cinnamon

-5 Tablespoons unsalted butter, room temperature

-1/2 cup sugar

-3 eggs

First, pre-heat the oven to 350F.

This is a pretty standard technique for mixing cookie dough: mix together the dry ingredients (in this case flour and cinnamon) and set aside. Next, whip the butter and sugar together until it’s nice and fluffy. You can do this by hand or with and electric mixer. Now add the eggs to the butter mixture and mix until they are fully incorporated (you’re better off adding them one at a time, trust me). Add the flour mixture and mix that just until it’s all in there. You don’t want to make too much gluten.

Now comes the fun part: Divide the dough into 24 equal pieces. An easy way to do this if you don’t have a scale is to divide the dough in half, then divide each of those into thirds, then divide each of those into quarters. And there you go: 2x3x4=24. Roll each one of these bad-boys into a snake 20 inches long. I find you’re better off just using your fingers, when I tried to use my palms they got all smooshed. Now join the ends together and gently scrunch them up into a scrunched-up shape. Elegant, me. You can also make most letters pretty well, while you’re scrunching. Play around with it. When you’ve got one done, place it on a buttered or papered baking sheet and move on to the next. These only puff a little bit during cooking, so you can place them pretty close togeter. Leave about 1 inche between each cookie. Bake the sheets, one at a time for 12 to 15 minutes, rotating once mid-way. Remove to a cooling rack and serve with a nice, hot beverage. Check out the links to some other cool cookie recipes I found.


Tagged , , , , ,

Oat Praline Buttermilk Bonbons. That’s Right.

I’m not 100% sure, but I think I just invented a new candy, then I dipped it in chocolate! I’m calling it the oat praline buttermilk bonbon. It’s a two-part recipe and takes a little doing, but it’s totally worth it.

Oat Praline Buttermilk Bonbons

Oat Praline

-1/3 cup steel-cut oats

-1/2 cup sugar

I haven’t tried this recipe with rolled oats yet, so I’m hesitant to say it will work just the same, but it might.

First things first, toast the oats by placing them in a dry frying pan (a six-inch if you have one) on a low heat. In a few minutes they’ll darken up a little and start to smell nice and toasty. Shimmy and stir them often to keep the toasting even. When they start to make a little crackly noise, transfer to a plate to cool.

IMG_20131005_070708

Now place the sugar in the same pan and melt on a medium low heat. When the sugar begins to melt, begin stirring with a rubber spatula and don’t stop until it’s smooth and slightly darkened. Turn off the heat, add in the oats and quickly stir until fully incorporated. Pour the mixture onto a parchment paper or, in a pinch, a buttered baking sheet.

IMG_20131005_070344

Let cool for about 15 minutes, then break into small pieces and crush either with a blender or chop on a cutting board, then use a cup and bowl as a makeshift mortar and pestle. This makes about 3/4 cup, which should be stored in an airtight container. Sprinkle on cakes, ice cream, oatmeal, or use in:

Old Fashioned Buttermilk Candy

When researching buttermilk candy I found this exact same recipe in no less than 6 different places, which means two things: 1) I have no idea where it originally came from, and 2) It had to be delicious. It is. My wife said it was candy for grown-ups.

-1 cup sugar

-1/2 cup buttermilk

-1 1/2 Tablespoons butter

-1/4 – 3/4  cup oat praline, depending on how oaty you like it.

Measure the sugar, buttermilk, and butter right into the frying pan and turn on a low heat. While waiting for things to get going, fill a clear glass with cold water. Trust me. You’re also going to need a spoon, mixing bowl, whisk, and small, buttered dish. A plate will work in a pinch.

IMG_20131006_014510

Once the sugar starts to belt and the milk boils, stir with your rubber spatula to dissolve the sugar. After that, stir just often enough to prevent sticking. After the mixture has been simmering for 10 minutes, when the mixture has thickened a bit, take a small spoonful of the liquid and dribble it into the water. It’s not really necessary to go through all the stages of candy temperatures (which wouldn’t be that accurate anyway due to the buttermilk and butter in the sugar) so I’ll just give you the pertinent information. When the liquid hits the water, it will probably dissipate into bits. This means it’s not ready yet. Try again about once a minute until the drop to turns into a little ball that stays more-or-less in ball form all the way down.

IMG_20131005_070115

When your candy reaches this stage, pour it into a mixing bowl, add the praline and start whisking. This is going to take about 10 minutes, so if you have an electric mixer you may want to use it.Keep whisking until pretty cool, at which point it should be thick and hold streaks pretty well.  Transfer this to  the buttered dish and allow to cool at room temp at least 3 hours or even overnight. Form into 1 1/2 inch balls, you should end up with about 14, depending on how much praline you used. Refrigerate until set, then store in an airtight container layered with parchment paper. These are super-delicious on their own or just rolled in a little powdered sugar, but if you want to chocolate coat them, who am I to stop you? Also, a little touch of sea salt never hurt.

IMG_20131006_014717

Chocolate Coating

-1/2 lb. semi-sweet chocolate

-that is all

Set up a double boiler by placing the chocolate in a bowl that is sitting on top of a pot with about an inch of water in it. Set to a medium heat and stir the chocolate until it melts. Be very careful not to let any water get in the chocolate or it will become all grainy and horrible.

When the chocolate is smooth, remove the bowl from the pot. Dip the candies in the chocolate one at a time, coating and removing as quickly as possible. You can cover them entirely if you like, or dip them partially like buckeyes. Refrigerate again to set the chocolate (half-an-hour) and store with parchment paper in an airtight container, which is always a good rule for storing candies.

IMG_20131005_065542

Tagged , , , , , ,

Wifey’s Spicy Cornbread

This week I followed The Missus around and took pictures while she made cornbread. She makes fantastic cornbread and I thought it would be cruel not to share this with the world. There are those of you who will be aghast at the presence of sugar in the recipe; but I should let you know that neither I, nor my wife, comes from a family native to The South. I should also let you know that the original recipe we started with came from The Joy of Cooking. We’ve been tinkering with it over the years, but I should give credit where it’s due.

Adobo Chili Cornbread (for a 6 inch cast-iron skillet. If using an 8 inch skillet, double the recipe)

-7/8 cups cornmeal (1 cup minus 2 Tablespoon)

-2 Tablespoons sugar

-1/2 teaspoon baking powder

-1/2 teaspoon baking soda

-1/2 teaspoon salt

-1 egg

-1 cup buttermilk (in a pinch you can fake buttermilk by mixing 1 Tablespoon distilled vinegar or lemon juice with 1 cup milk)

-2 chipotles in adobo sauce (available at most grocery stores with a decent Latin American selection)

IMAG0157

Butter up your skillet real good, then place in the oven and pre-heat to 350F.

Chop up the peppers in an 1/8 inch dice. I like to use a plastic bag so I don’t mank up my cutting board.

Whisk together the dry ingredients in one bowl, and mix the buttermilk and egg together with a fork in a separate bowl.

IMAG0154

Pour wet into dry, and whisk together quickly. Once the buttermilk reacts with the baking soda, the timer on leavening starts. Mix in the chopped chilis, remove the pan from the oven and pour in the batter. The batter will start to cook immediately, this is good just be careful.

IMAG0161

Put the pan back in the oven and set your timer for 20 to 25 minutes. When it’s done, a knife will come out clean. Let it cool about 10 minutes and it should pop right out of the pan. You can eat this immediately if you want, but the chili flavor will come out better the next day.

IMAG0164

Tagged , , , , ,

Everybody Does a No-Knead…

No-Knead bread made the rounds online back in ’06 when Bittman made it famous writing for the New York Times. It wasn’t the first such recipe, but it definitely popularized the technique. Since then, there have been myriad variations and of course I have my own. I’ve also  experimented with combining this technique with a similar one I learned about in Peter Reinhart’s The Bread Baker’s Apprentice, called pain a l’ancienne, which I’ll talk more about later.
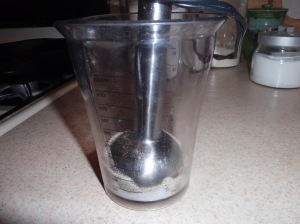
IMAG0140

No-Knead Boule

-14 oz. or 2 1/2 c. all purpose flour (you know I love my King Arthur)

-2 oz or 1/2 c. Whole Wheat flour

-1/4 teaspoon dry yeast

-1 teaspoon table salt

-1 1/2 c. water

The mass appeal to this recipe lies in the high fiddliness to tastiness ratio. By which I mean, it’s really tasty and really easy. The only problem with this recipe is that you need a cast iron or enamal Dutch oven. A steel stock pot will not work.

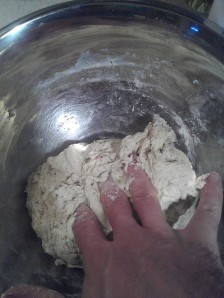
Step one is just mix all this together, cover and leave at room temperature for at least 12 but not more than 16 hours. For some reason leaving it longer than 16 hours has a slightly detrimental effect on the flavor. UNLESS you want to let it go a solid 24 hours, in which case you can also employ the pain a l’ancienne technique by making the dough with iced water, and leaving it in the refrigerator for 12 hours then moving it to room temperature for another 12 hours. The advantage here is a more complex flavor due to enzymes and stuff. Try it out, it’s fun.

IMAG0123

12 to 24 hours later, you’re going to have a big, wet, bubbly mass of dough. It looks pretty thin, that’s alright. Using a rubber spatula, maneuver the dough onto a well-floured surface into a round-ish shape. I like to use the whole wheat flour for this, and I’m serious about the well-floured part, you’re better off using an extra couple of Tablespoons of flour than having the dough stick to the counter. Let is sit for 15 minutes, it’s not going to look any different afterwards, but the glutens will relax and the dough will be much easier to work with.

Run your fingertips under the edge of the dough to make sure it’s not sticking, then fold the dough into thirds like a letter. ‘Cause you know, that’s still a relevant turn-of-phrase. Now fold it in thirds the other way, so you have a nice looking ball. Do your best to brush off any major lumps of flour.

IMAG0131 IMAG0133 IMAG0135 IMAG0136

Flour up a piece of fabric (butter muslin, a linen napkin or even a tee shirt, but not terry-cloth) which you can transfer the dough, seam side down, onto. Fold the corners up to loosely cover the dough and let sit 1 to 1 1/2 hours. Whatever you do, don’t let it get wider than the base of your Dutch oven. Speaking of which, put the Dutch oven in your oven now and pre-heat to at least 500F, or higher if your oven goes higher.

No comes the fun part. When the oven is heated and the bread is risen do these in this order:

-Unwrap the bread, make sure the edges aren’t stuck to the fabric.

-Take the super-hot Dutch oven out of the oven, take the lid off, leave the oven door open.

-Pick up the dough, with your hand under the fabric.

-Flop the dough, seam side is now up, into the pot. Shimmy the pot a little to center the dough. It’s fine.

-Lid on the pot, pot in the oven, shut the door, set timer for 20 minutes.

IMAG0137

After the first 20 minutes, take the lid off the pot and set your timer for another 20. Depending on your oven you may need 25 minutes, the bread is done when the crust is brown and crunchy.

Remove from Dutch oven, let cool to room temp, enjoy. Feel free to knock off any excess flour.

This bread makes a particularly excellent grilled cheese sandwich, by the way.

Tagged , , , , , , , ,

Marbleized Shortbread

Shortbread was one of the original posts I wanted to do for this site, but it seemed a little too simple. I don’t want this to be one of those blogs that posts a recipe for scrambled eggs or a cheese sandwich. I’d considered perhaps posting two or three different recipes, e.g. Scotch, brown sugar, and chocolate to make up for the utter simplicity of them, but that still didn’t seem right. Yesterday it hit me all at once, marbleize the Scotch shortbread and brown sugar shortbread. It took a little tinkering to make sure the consistency would be the same for both, but I worked it out and am pretty pleased with the results. Right after I put it in the pan I realized that next time I make this I should make an Earth, or if The Missus has her way, Westeros. Break out a little food coloring and the possibilities are nearly endless.

Marbleized Shortbread

makes an 8″ round (12 pieces)

For Scotch shortbread:

-1/3 cup white sugar

-1 stick butter, room temp.

-1 cup all purpose flour

-1/8 teaspoon salt

For Brown Sugar Shortbread

-1/2 cup light brown sugar, packed

-1 stick butter

-1 cup all purpose flour

-1/8 teaspoon salt

-1/4 teaspoon cinnamon

I would suggest making the Scotch shortbread dough first so you won’t have to wash the bowl between batches. The technique for making each is the same, so I’ll just go over it once. Preheat the oven to 350F.

IMAG0099

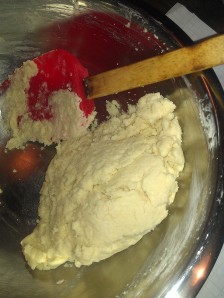
Place the butter in a mixing bowl and whisk it good for at least one full minute, then add the sugar and continue whisking for another minute and a half. When the butter climbs the sides of the bowl, just scrape it down and continue whisking. Using a rubber spatula, fold in the flour and salt just until it becomes a solid mass. Place the dough on a plate and start over with the brown sugar, don’t forget to add the cinnamon with the flour this time. For an even more dramatic color difference, you can substitute 1 or 1.5 Tablespoons of cocoa powder for the flour with no  ill effects.

IMAG0098

I baked mine in the 8″ cast iron, but if you don’t have a cast iron skillet you’re comfortable baking in you can use a glass baking dish of the same size. Shockingly, there is no need to grease the pan for this recipe. Take little hunks of both doughs and randomly distribute them around the pan.

IMAG0101

When you’ve got a pretty even distributiton, use your fingertips and gently press it down to make sure the height and density are even. Now use the back of a spoon or the bottom of a glass to smooth out the surface. Good. Now score it with a knife to make 12 pettiecoats (as they are called) and poke it all over with a fork. No one knows why.

IMAG0106

Place in the middle of the oven and bake for 45 minutes, turning about halfway through. When done, the edges will be browned, although the center may feel a little soft. Re-cut the score marks and let cool in the pan 15-20 minutes before removing to a cooling rack. The color will darken as it cools, serve at room temperature.

IMAG0111

Tagged , , , , , ,

Homemade Sea Salt, Boiled Peanuts and More!

Last week I promised you all updates on my experiments making sea salt at home and boiled peanuts. After hours of fun watching pots of water boil, I’m ready with the results.

Homemade Sea Salt

-1 gallon sea or ocean water

-that’s it

IMAG0085

First of all, the most common question I’ve gotten about harvesting your own sea salt is, “Is it safe?” According to my research, the rule of thumb is: if it’s safe to swim in, it’s safe to make salt from. I don’t normally post recipes which require a disclaimer, but this was too cool a project to pass up.

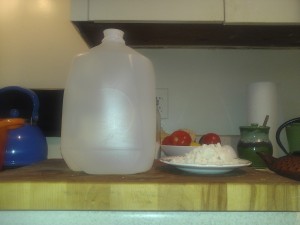
No matter where your water came from, or how clear it looks, you’re going to want to filter it. A coffee filter will be good enough, I used a double layer of butter muslin. If using cheese cloth, make sure to do four or five layers. Now fill a pot with the filtered water, and boil it for, like, three hours. Check it periodically, but don’t expect much change for the first two and a half hours. Eventually you’ll get down to a sludgey consistency like in the picture.

salt

At this point I switched it over to a frying pan and turned the heat down to medium-low, just a good simmer to evaporate the last of the water. Remember, while you don’t have to worry about burning salt you don’t want to burn your pan. As far a yield goes, I got 4.5 ounces from one gallon, which is about half a cup. Way more than I expected. Your’s may be different based on the salinity of the local water. Be sure to store the salt in an air-tight container since salt absorbs water from the air. You can also use a salt pig, which I just learned about and totally need to make one of.

Boiled Peanuts

-1 pound raw peanuts, in shell (they can be tricky to find but it’s very important they are raw, in shell)

-1 gallon water to start, you’ll probably need more later on

-2 Tablespoons salt

-2 Tablespoons paprika (or Old Bay)

-2 Tablespoons honey (optional and not traditional, but I like it)

You ready? Pay attention: Put everything in a pot. Stir a little. Boil four to six hours, depending on how soft you like your peanuts. You’ll probably need to add some water periodically as it boils away. Done. Be sure to keep them in the water so they’ll keep soaking up flavor.

IMAG0081

In regards to the, “and More!” promised by my title, I’m officially announcing the start of a youtube show in which I demonstrate scratch-made recipes with only two ingredients. It’s kind of ridiculous how many I have. I’ll let everybody know as soon as the first one is up, which should be by Wednesday.

Tagged , , , , , , ,

Banana Chocolate Chip Scones

The secret to making the best possibe scones, in my opinion, is to take a page from a vegan cookbook and use bananas instead of eggs. Two notes here: the usual conversion is 1 egg to half a banana, but this ignores the fact that bananas come in different sizes. I always go with 1 egg to 1/4 cup banana. Also, I’ve gotten a few requests to give my flour measurements in volume and weight, so for this recipe I measured out my flour and then weighed it. I also updated Whole Wheat Focaccia with volume measurements.

-1 3/4 cup (9 oz.) all purpose flour

-1/2 teaspoon salt

-2 1/4 teaspoons baking powder

-1/2 stick (1/4 cup) butter, medium dice (or vegetable oil if you’re sticking with the vegan theme)

-1 banana, mashed up real good (should equal 1/2 cup, if shy add milk to make up the difference)

-1/3 cup soymilk or milk (or heavy cream if you’re feeling sassy)

-1 cup additional stuff (here I used some chocolate chips and almonds I had left over, feel free to use dried fruits or nuts)

Pre-heat oven to 350F.

OLYMPUS DIGITAL CAMERA

Combine the dry ingredients in a mixing bowl and add the diced up butter. The clumps will stick together so rub them in with your hands to break them up. People tend to freak out about this stage but don’t as long as none of your butter is bigger than a marble, you’re fine. If you’re making this vegan, mix the oil in with the other wet ingredients.

If you’re adding stuff, do this now. Make sure to coat the stuff with flour so it will mix in better.

The best way to mash up a single banana is on a plate, with a fork. No need to dirty up your blender or another mixing bowl. Transfer into a measuring cup, you should have about half a cup. If you have less make it up with milk, if you have more eat it.

Once you’ve got that sorted out, add 1/3 cup of milk to the banana and mix them up together.

Pour over the dry ingredients and mix together very quickly just until everything is combined into a solid mass. I will be best to use a rubber spatula or wooden spoon, a whisk will just get all clumpy.

OLYMPUS DIGITAL CAMERA

Transfer to a baking sheet and form into an 8 inch disk. It won’t be perfect, it’s fine, they’re scones.

Dribble 1 Tablespoon of milk over the dough and use your fingers or a pastry brush to even it out. If you like, now would be the time to sprinkle additional sugar over the top although this is not strictly necessary.

Cut the disk into sixths or eighths now, that way when it comes out of the oven it will be much easier to divide.

OLYMPUS DIGITAL CAMERA

Bake at 350F for 20 minutes, immediately re-cut and transfer your little babies to a cooling rack. You can enjoy these right away or over the next 2 to 3 days. Any longer than that and you’ll want to freeze them (be sure to use an airtight bag.) To defrost just pop them in a 350F oven for 5-10 minutes.

OLYMPUS DIGITAL CAMERA

Tagged , , , , , , ,

Potato Bread

Studies have shown that the most popular posts on Simple and Complex are the baking posts. So without further ado…

Potato Bread (from A Baker’s Tour by Nick Malgieri) one of my new favorite cookbooks

-1/2 lb AP flour

-1/4 cup potato, boiled and mashed up good

-3/4 teaspoon dry yeast

-1 1/2 teaspoon salt

-1/3 cup milk

-1/3 cup warm water

OLYMPUS DIGITAL CAMERA

Use a fork to make sure the potato is mashed up nice and fine, then use your hands to work it into the flour. Add the salt and yeast to the flour next and stir it around to make sure you don’t get any clumps.

Regarding flour, I usually use King Arthur but being back in The South I had to buy some White Lily. For those of you who don’t know, White Lily is highly regarded for making cakes and biscuits because it’s made with soft winter wheat as opposed to hard. This leads to a lower amount of protein and gluten, but I’m going to give it a try in potato bread just for fun.

Measure the milk into a 1 cup measuring cup, then add the 1/3 cup of hot water. This way it ends up being warm-ish, which is about what you want. Add this to the flour mixture, and stir until all the liquid is absorbed.

Cover and let sit for 10 minutes to let the flour hydrate and yeast activate.

After 10 minutes has passed, knead the dough by hand for 3 minutes. Then place in an oiled bowl, cover and let rise for 2 hours. Go ahead and oil up your loaf pan now.

OLYMPUS DIGITAL CAMERA

When the dough has doubled in size, flop it onto a well floured surface and form it into a rough rectangle which you can roll into a bread loaf. You might need to fold the edges over, it’s fine. In some regards, bread is more forgiving than people tend to think. Loaf shaping is one, also baking temp (but that’s a different story.)

OLYMPUS DIGITAL CAMERA

Preheat the oven to 400F and place the dough in the greased up loaf pan seam-side down, let rise about an hour until it’s almost doubled (as per usual.) I could tell at this point by White Lily experiment wasn’t going so well.

Bake for 30 minutes, until golden. Immediately remove from the bread pan and let cool on a rack for about an hour. As you can see, the White Lily didn’t work for a sandwich bread. However, it is still delicious with brie and jam. I have since learned that White Lily makes a bread flour. Perhaps I’ll use that for a future experiment.

OLYMPUS DIGITAL CAMERA

Tagged , , , ,

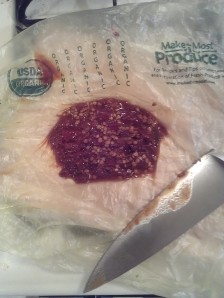
Corned Beef: Homemade Charcuterie Vol. 1

I’m not usually one to go on about where my ingredients come from, I prefer to just assume you’re getting the best you can afford and go from there. This, however, requires some backstory: Annually, my father will raise a cow (maybe a pig or two) to have slaughtered and stock up the big freezer with meat. Generally my sister and I get a cut of the haul, but since my wife and I just spent 3 years in Iowa City, IA this time the cut came with conditions, “Well, whenever you move back to The South, there’s a quarter of a cow with your name it.” As if we didn’t want to get home enough already. Luckily, The Missus landed a gig at University of Georgia in Athens.

We don’t have enough freezer space to accommodate that much meat, so we’re getting it in batches. The folks will be coming down this weekend for the holiday and all we have left of the last batch is a wee brisket and the ox tail (which we’re saving for the fall and ox tail stew season.) Time to use up that brisket and make room for some flank steak. And time to do something I’ve always wanted to do:

Corned Beef:

-1 brisket (mine is 2 lbs.)

-2 Tablespoons sugar

-2 Tablespoons pickling salt (any fine grain salt will do, as long as it’s not iodized)

-2 teaspoons black peppercorn

-2 teaspoons allspice berries

-2 teaspoon juniper berries

OLYMPUS DIGITAL CAMERA

Combine all your dry ingredients and blend them up good.

Place your brisket in a non-reactive dish, and coat with the dry mixture. Make sure to cover the whole thing.

OLYMPUS DIGITAL CAMERA

Cover with plastic wrap and refrigerate, flip the brisket once or twice a day for 1 week.

OLYMPUS DIGITAL CAMERA

Next week we’ll take a look at it and I’ll have a Potato Bread recipe that I’ve been having luck with lately.


Tagged , , , , ,
ice cream magazines

................... for lovers of ice cream. Your free on line magazine for sweet frozen treats. Recipes, inspiration, artisanal ideas for your delectation.

salt and lime juice

food filled with nostalgia for mexico ♥

Vegan Monologue

Just food! No nonsense. Portland, OR.

Simply Made Kitchen and Crafts

Wholesome family living, simple recipes and crafts

Chef in disguise

Easy authentic middle eastern recipes

Fromage Homage

A British Isles Cheese Odyssey

But First, We Eat

History of All Things Food-Related

aquamarinestephblog

Writing, traveling, cooking & looking for ancestors....1 person at a time.

sweetsavant

I cook, entertain and share my recipes, ideas and sometimes a stray thought or two

Sockmonkey's Kitchen

Foodie turned blogger. How'd that happen?

Getting to know CO

Exploring CO's wildlife, parks, events, and places of interest, plus cooking and whatever else I feel like blogging about!

sensitive flour

Gluten-free cooking, baking, eating

Cucina Amore Adventures

Drop in for an Espresso & an exciting bite to Eat. Lets share our crazy adventures!

The Solo Cook

The single's guide to growing, cooking and savoring food

Stef's Gastronomy

Life's too short tofu around

Afroculinaria

Exploring Culinary Traditions of Africa, African America and the African Diaspora

Rachel Gaffney's Real Ireland

Bringing the Real Ireland to your life

Rotem's Beyti

Cooking and eating adventures in Israel

Get Forked

Recipes, Ramblings & Restaurant Reviews

Sauce Boss

The Madness, Memoirs and Musings of a Culinary Dark Genius

Just Garnished

edibles jazzed up with a personal twist

A Crust Eaten

Living life one plate at a time

ButterNBourbon

Southern Gentleman's Indulgence

Mind Your Peas & Food

Mindful Food for Mindful Eaters

Chaos and Cookies

Where life and food come together!

Fleur-De-Licious

Butter || Sugar || Real life

The Perky Poppy Seed

Everything Food from a Perky Personal Chef's Perspective

Eating With Ziggy

Dining Well, Spelling Pourly

Nutty Kitchen

cook for life!

Eating Whole

A vegan & allergy-friendly lifestyle.

Becca Steinhoff

Comedian, Writer, Smartass

phickles

a small batch pickle company in Athens, Georgia ...preserving the best of every season!

Cook Up a Story

Inspiration and Recipes for Growing Families

BitterSweet

Sweet Musings with a Bitterly Sharp Wit

Foodologie

A Blog about Balancing Health with a Constant Desire to Eat Cake

One Man's Meat

Multi-award winning food blog, written in Dublin, Ireland.

Best Room in the House

"No matter where I serve my guests, it seems they like my kitchen best."

Pocket Full Of Rye

College, Cookery, and Photographs

We Call Him Yes!Chef!

"because life is too short to eat crappy food"...Yes!Chef!